If you are planning to move your WordPress website to the new host or a server, then this blog post is for you.
Since WordPress is always hogged up with a ton of memory, it becomes crucial to opt for a web hosting plan, which is optimized for WordPress. If not, then you can migrate your site to the new server. However, most of the website owners find difficulties, such as potential downtime or loss of data while migrating their site to a new host.
If you are facing the same situation, then we will show you the simple process of migrating a WordPress site to a new host with zero downtime through this blog post.
Note: Before diving into the process, you should know that most of the WordPress hosting providers render migration services at free of cost.
1. Create a backup of your database
Before moving your WordPress site to a new server, make sure you create a backup of your wp_content and database. Apart from this, also get rid of the following things:
- Previous database backups
- Unused/outdated themes and plugins
- Cache files
- Spam Comments, trash comments and posts.
You can even install a WP-DB Manager plugin to automatically optimize, backup, and restore the database of your website before migrating it to the new host.
Don’t forget to create a backup of the WP-content folder. You can easily compress and take a backup of this folder by logging in to the file manager from cPanel (in case you are using cPanel hosting), or else, you can backup your wp-content folder using any FTP client.
2. Selection of New WordPress Host
Choose a reliable WordPress hosting provider that can assist you with all the possible solution and handle your website speed effectively. Below are some solutions that you can go for while selecting your new host:
- If you are looking for a reliable shared hosting for WordPress migration, we would recommend you to choose Bluehost.
- If you can afford, you can go for cloud hosting or location-specific providers. While there are several options available on the web, we suggest you opt for Siteground. They focus more on providing services including automatic updates, WordPress SuperCacher, and other premium support.
- In case, you want the dedicated web hosting service, you can go for InMotion Hosting. They offer first-rate class servers and support to their customers.
3. Install Duplicator to simply migration process
Duplicator is a great WordPress plugin that can help you move your website to the new host without downtime. So, first download this plugin and activate it on your website.
After installing the Duplicator, trail the following steps:
- Access the Duplicator → Packages section right in your WordPress dashboard.
- Click the “Create New” button in the top right corner of your screen.
- Hit the “Next” button and follow the steps to create your package.
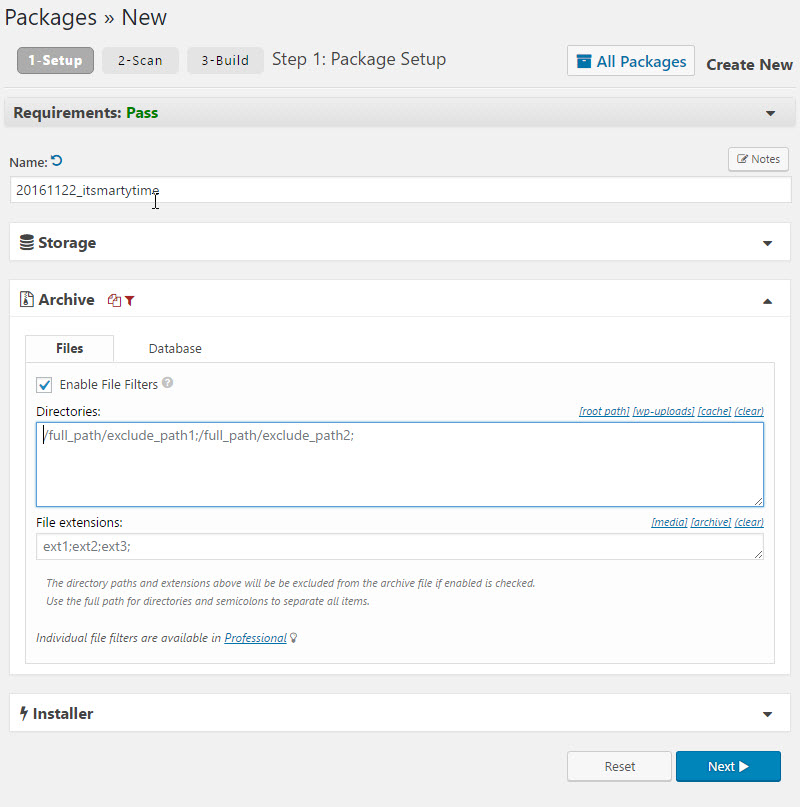
- Don’t forget to cross-check your results while creating your package.
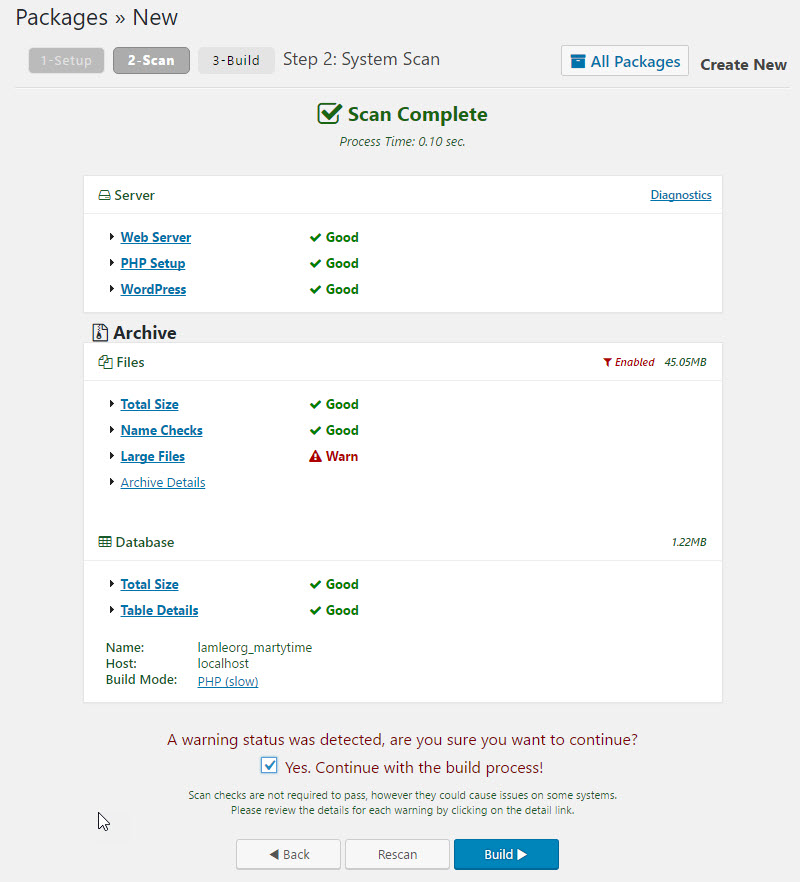
- Click on the “Build” button to complete the package process. This could take longer to complete so you can leave the tab open.
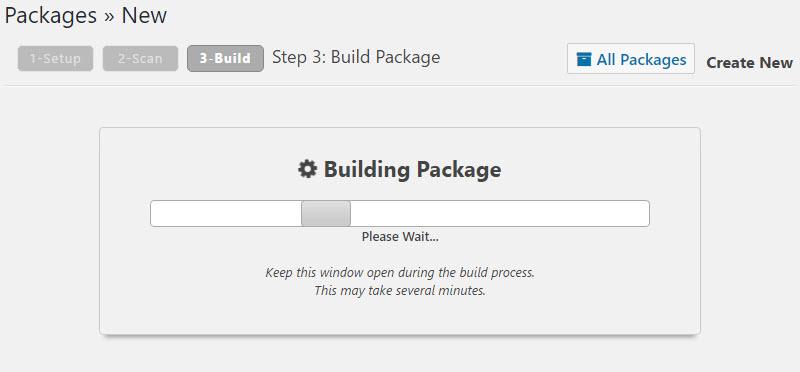
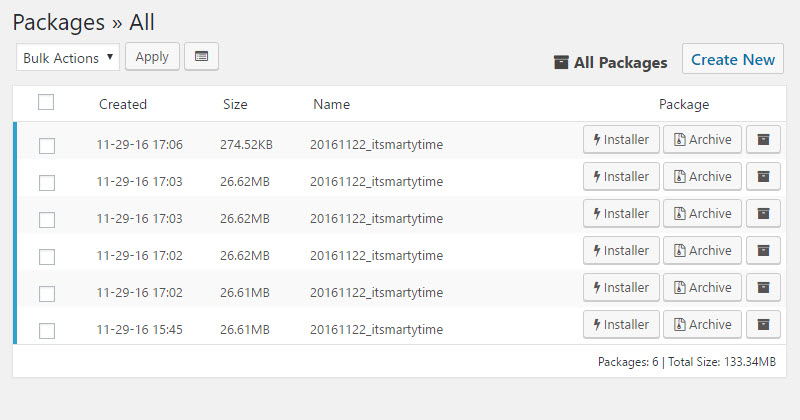
- After the completion of process, you can click on both the Installer and then the Archive buttons. This will download the package.
Both the files are essential in the migration process. The copy of your site is in the archive file, while the installer file will help you automate the installation process.
4. Migrate your Website to the New WordPress Host
Once downloading both the archive and installer file, it’s time to move them to your new host. Use FTP client to connect to your new web hosting server.
Instead of submitting your domain name, use the IP address of your new host. It’s because the domain name still points your old web host. So, if you use the domain name, all your files will be transferred to the old host instead of the new one. So, keep this point in mind.
Now, upload both the archieve.zip and installer.php file to your site’s root directory using your FTP client. It is something like this:
/username/public_html/ or
/username/public_html/mywebsite.com
(here ‘mywebsite.com’ is you domain name)
Tip: Ensure that your root directory is empty before you importing both your files.
5. Tweak the Hosts File to reduce downtime
After uploading both your files to your new host, you will need to open the installer.php file using the URL something like this:
http://wwwmywebsite.com/installer.php
But the problem occurs when the URL directs you to your old web host and you will see a 404 error. As I mentioned above that your domain name points to your old web host, you will need to enter the IP address of your new host.
First, you will need to ensure 100% uptime, without affecting your old site. And for that, you will need to access your new site temporarily on your desktop computer. You can do this by changing your hosts file. This ensures that your domain name points to your new host, but only when you are using your computer. Below is the step of changing the hosts file with the new IP address:
- Log into your cPanel dashboard >> click on expand stats link to expand the sidebar.
- Now clone the Shared IP Address.
- Access the Programs >>Accessories >> right click on Notepad and select Run as Administrator.
- Click Yes to launch Notepad with administrator privileges.
- On the Notepad screen, navigate to the File>> Open and then go to C:\Windows\System32\drivers\etc.
- Choose hosts file and access it.
- Now paste the copied IP address and then place your domain name something like this: 189.675.9.88 www.mywebsite.com
- Click on the Save Changes button.
6. Start the Migration Process using Duplicator
Under this step, you will need to run the installer.
- So first, navigate to the URL (replace it with your URL) in your Window’s browser: http://www.mywebsite.com/installer.php
- Now submit the database information in the fields and click on the Test Connection button
- After connecting to your database, read the warning and notices mentioned in the box.
- Click the Run Deployment button.
- The installer will automatically import your database.
Once you are done with this, you will be asked to verify your old as well as new paths. So, click on the Run Update to update all your URLs.
7. Update your domain name servers
This is the last step that will help you take your users to the new location of your website when they type your domain name. For that, you need to update your domain by changing your DNS nameservers.
If you already registered your domain with your hosting provider, then you can easily move it to the new host. But if used a domain registrar such as Godaddy, you will need to change your nameservers.
Conclusion
The steps mentioned above in this blog post will help you migrate your WordPress site to the new host without any downtime. Just make sure your new WordPress host is reliable and secure.
About the author
Brandon Graves is a professional web developer and blogger by hobby. Right now, he is working as WordPress Consultant at HireWPGeeks. Apart from these, he loves to write everything about WordPress and share her thought with readers on the web.